If you are using Chrome, click the red hand button at the top right of the screen:

Then select: Don't run on pages on this site
If you do it correctly, the red hand will turn to green and you will no longer see this message.
 to drag the 1st layer onto the background.

Hey, screw the stars, you know what I remembered is fun in Photoshop. Tattoos! Want to try out that tattoo you've been planning on getting? Here's how to do it. Good fun.
For those of you not familiar with combining pictures, you can drag pictures/layers/elements to and from each other. It's a lovely Photoshop feature.
What I start off doing is I drag the "tattoo" image into the picture of the person I am putting the tattoo on.
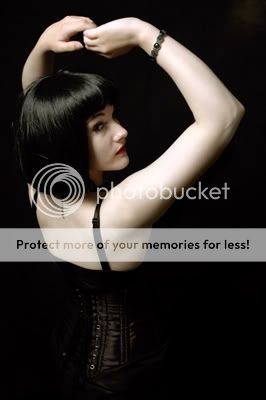
Next, use "magic wand" to take out the areas you don't want.
TIP: when using magic wand, remember you can adjust the tolerance (up in the top bar) to take more, or less, depending on the similarity to the colour of what you have selecteed. De-selecting contiguous will remove everything of a given colour (and everything similar, depending on the tolerance.) It can be useful, but is generally not a good idea. Also, when using magic wand, I strongly suggest right clicking and selecting "feather" and then setting the feather radius to 1 px. This gives a smoother edge. Also, remember to right click and DESELECT, as if you don't you won't be able to modify anything but what is inside the selected area.
After you have cleared out unwanted areas, right click and select "free transform" to resize and reposition the picture to where/how it needs to be.
While you are in free transform, right click again and select warp. If you haven't used it before, play around. It's quite easy, just push the boxes around...
When you have the image set convincingly against the body, in the layer window, change the layer mode to "multiply"
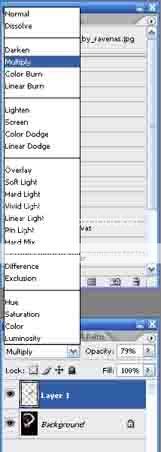
and then play around with the opacity. You'll see mine is set to 70 odd %.
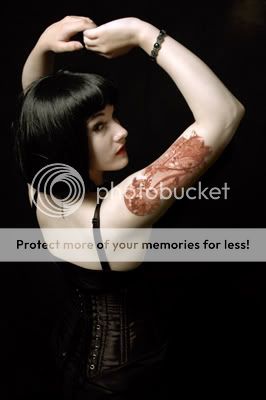
So, you're done. I'd suggest doing some tweaks like burning/dodging, changing the contrast/brightness etc until it "fits". Once you are done, flatten the image, and save as jpg. There you go, insta-tattoo.
"If You Can't Reach the Stars, At Least You Can Make Them" - Photoshopping Stars.
"Face it, Your Camera Sucks." - Editing your photos, basic techniques (clarity and balance, etc)
"Nobody's Perfect, and Nobody Needs to Know." - Editing your photos, advanced techniques (hahahaha, free digital surgury, etc)
(11/14 note: I've put these on hold for the sake of the stamps/sigs tutorial. They should still be up in a few weeks.)
I don't really know how to describe this one, so here's an example. We start with this 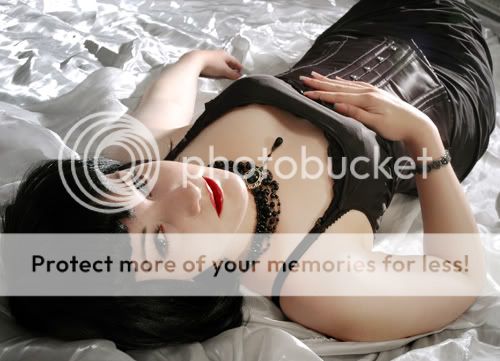
and turns it into this
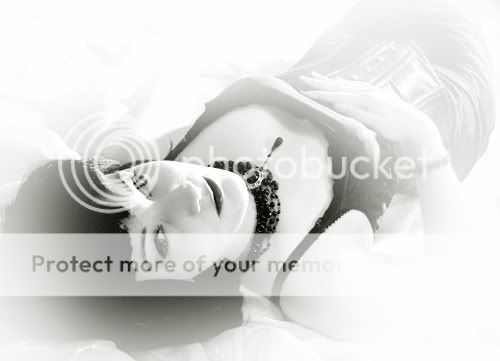
Yes, I'm sure you could use a simple brush/border/overlay to create this effect, but if you want it to be tailored to your image, than this tutorial will teach you how. Note that you can use black for the fade effect if you really want. This is what it would look like...

It's kind of hot...
Anyway, lets start.
---
I'll start off with a trick for a (n advanced) variation, since the start is the best place for this to be done. If you want to keep the iris saturation, you'll want to isolate them from the rest of the processing. To do this, you will
1. Select the eliptical marquee (The cut tool, click the little arrow on the corner and select the circular one...)
2. Start dragging around the iris. Don't worry if it's in the wrong spot, because you can move it. TIP: pressing shift will keep it a circle, rather than an oval.
3. The second eye is a little trickier. Hold shift and drag from away from the first selection towards it. This adds both selections to the layer you'll be creating.
4. To create a layer for these objects, hit ctrl+J
5. Drag the layer to the top, and don't forget to bring it back to the top if it gets buried.
If you've selected this variation, you'll want to add some oomph to the eyes. To do this, I suggest Image>Adjust>Variations. With the slider on fine (rather than coarse), increase the saturation one or two clicks. You can also enhance the colour by hitting the colour of choice in "mid-tones".
---
To convert your image to grayscale, we'll be using a different method than Adjustment>Desaturate. Instead we will be creating a Hue/Saturation layer. Layer>New Adjustment Layer>Hue/Saturation. I suggest naming it or giving it a different color while you are creating it, just to make your layers easier to keep track of.
You could skip this next step if it's too hard, but you may as well use a pre-fab effect if you're going to.
Next, we will be doing Levels adjustment layer. Layer>New Adjustment Layer>Levels. On the first slider, bring the black and white triangles closer to the middle. The exact measurements depend on the picture. I suggest bringing the white closer to the middle than the black. You may also need to move the grey around a little. Do not change the output levels.
The great thing about this layer is you can come back and change it if it's not right later on.
For the final step, we will be whiting (or blacking) out the areas of the image we do not want.
We will start off with a new layer (Layer>New Layer), nothing special.
Select the brush tool, and pick a soft brush (one with faded edges). I like mine at 100% opacity, and 15% flow. Pick your colour and start painting away. I myself draw a loose, fluid circle around the picture a few times before tightening in.
Tweak it as you see fit, flatten the image (Layer>Flatten Image) and you're done!
I am a true Voyeur, and so I was looking to find an effect that made my pictures look like they were captured off of a TV screen. Before I start, I would mention that this is applicable to TV screens, I will work on a computer monitor version later, as there are differences.
So, lets start with a new transparent document that is 1wx2h.
Now, zoom in, until you can edit it at the pixel level (some suggest 1600%, but 400% can work...)
Take your pencil tool, in black, and colour in the top pixel, so it looks like this:

Next, select edit>define pattern, name it (scanline is a good idea ;)), and hit ok.
We can now apply the effect to the picture...
I started with this 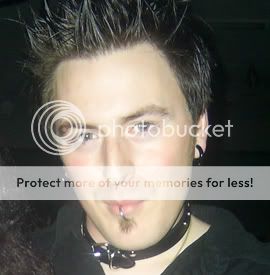
On your picture, select Layer>New>Layer (shift+ctrl+N) and on that layer hit alt+backspace, then select "scanline"
Your picture will now have scanlines!
I would suggest from here you further modify it to your tastes, by changing the layer opacity, contrast/brightness...
I would also suggest if you want a grainy/pixellated look, add noise to this layer (Filter>Noise>Add Noise). I would suggest around 17% Gaussian, not Monochromatic (though that's a matter of taste). I would suggest adjusting it (Image>Adjustments>Variations is quick and easy), to be less saturated and slightly blue. You may also wish to increase/decrease the density of everything. This can be done using the Cut tool>Free Transform> and then using the W: and H: areas at the top to increase the layer size (this is more uniform, and 150% is usually good).
For the final touch, you may want to add glare to your TV, for realism. This is simple. Add another layer, select an area, a normal brush at 100% Opacity and 15% Flow... Start with a large, diffuse brush, and work your way down to a small brush...
Your final product will look something like this 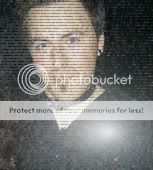
I've started this area of my journal to share with you my Photoshop experience. I have been working with Photoshop/PSP for over 5 years, and have developed a mental library of methods to acheive effects. I will be posting tutorials, tip/tricks and taking requests. Some of the tutorials will be similar to ones you have seen before, but with my own input/tweaks on them. Feel free to add to favs, as this section will be expanding regularily/quickly.
COMMENTS
-